


ENGINE OIL LEVEL
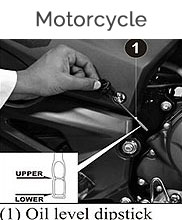
Check engine oil level each day before operating the two-wheeler.Oil level must be maintained between the upper(2) and lower (3) level marks. Check for leaks.
- Park the vehicle on its main stand on a level ground.
- Start the engine & let it idle for 3-5 minutes.
- Stop the engine, Remove the dipstick, wipe it clean and insert the dipstick without screwing it in.
- The oil level should be between upper and lower mark on the dipstick.
- Do top up if oil reaches towards the lower level mark or on every 3000 Kms
Add the recommended engine oil through dipstick opening to the UPPER level mark.- Do not overfill.
- Reinstall the dipstick and check for oil leaks.
Engine oil Top Up process (With Oil Level Window)
- Park the vehicle on its main stand on a level ground.
- Start the engine & let it idle for 3-5 minutes.
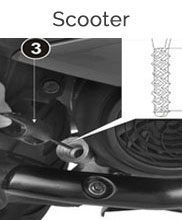
- Stop the engine, After 2-3 minutes check the oil level in the oil level window. It must be between upper and lower level marks.
- Top up engine oil if the level of the oil reaches towards the lower mark (alternatively on every 3000 Kms)
- Add the recommended engine oil by removing the oil filler cap and filling till the upper level mark. Do not overfill. Reinstall filler cap and check for oil leaks.
- Upper level mark
- Lower Level Mark
- Oil level dipstick
Drive Chain
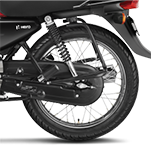
Inspection
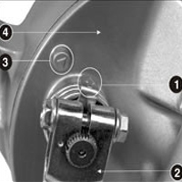
- Turn the engine "OFF", place the motorcycle on main stand and shift the transmission to neutral. Remove cap hole (2).
- Drive chain slack (3) should be adjusted to allow approximately 20-30 mm vertical movement by hand. Rotate the wheel and check drive chain slack as the wheel rotates. Drive chain slack should remain constant as the wheel rotates. If the chain is slack in one section and tight in another, some links are kinked and binding. Binding can be eliminated by frequent lubrication.
- Turn the chain to view chain lock plate (4) inside the hole. Ensure that the chain lock plate open end (5) is installed in the opposite direction of the chain rotation.
- Inspect the sprocket teeth for wear or damage.
- If the drive chain or sprockets are excessively worn or damaged, they should be replaced. Never use a new chain with a worn out sprockets since this will result in rapid chain wear.
Adjustment
- Place the motorcycle on it’s main stand with the transmission in neutral and the ignition switch in “OFF” position.
- Loosen the rear axle nut (1) and sleeve nut (2). Loosen the drive chain lock nut (3).
- Turn both the adjusting nuts (4) in an equal number of turns until the correct drive chain slack is obtained. Turn the adjusting nut clockwise to decrease the slack or anticlockwise to increase the slack of chain.
- Align the chain adjuster index mark (5) with the corresponding scale graduation (6) on both the sides of the swing arm equally.
- Tighten the rear axle nut and sleeve nut. Check the drive chain slack again.
Note: On loosening of the drive chain the chain adjuster moves towards right hand side. If drive chain slack is excessive when the rear axle is moved to the farthest limit or adjustment, the drive chain is worn out and must be replaced.
LUBRICATION
- Turn the engine off, place the motorcycle on its main stand and shift the transmission into neutral.
- Lubricate the drive chain by applying liberal amount of SAE – 90 oil or chain lubricant.
Regular adjustment and lubrication as per the maintenance schedule would ensure high performance and longer life.
Fuel Level/ Fuel Valve
Glamour Programmed Fi
- Ensure sufficient fuel is available in your fuel tank for your journey. Check for leaks.
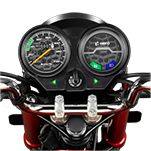
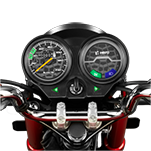
- The fuel gauge is liquid crystal type.
- The approximate amount of fuel quantity available in the fuel tank is indicated by the number of segments in the display.
- Each segment displays approx.1.5 litres of fuel.
- If all the segments are displayed it means fuel quantity in the fuel tank is 12 litres.
- If only one segment is displayed above the red mark, this indicates that the fuel quantity is low and the fuel tank should be refilled as soon as possible.
Glamour Programmed Fi INDICATOR
When the ignition switch is turned "ON" the Glamour Programmed Fi indicator lamp (RED) glows for a seconds and then it should go "OFF".
ACHIEVER, HF DAWN, HF DELUXE, GLAMOUR, KARIZMA, PASSION XPRO, PASSION PRO, PLEASURE, SPLENDOR +, SPLENDOR NXG, SUPER SPLENDOR
Ensure sufficient fuel is available in your fuel tank for your journey. Check for leaks.
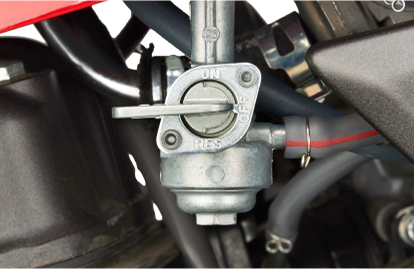
Fuel Valve - The three-way fuel valve is on the left side of the carburetor.
OFF- At "OFF" position fuel cannot flow from the tank to the carburetor. Turn the valve "OFF" whenever the two-wheeler is not in use.
ON - At "ON" position fuel will flow from fuel tank to the carburetor.
RES - At "RES" position fuel will flow from the reserve fuel supply to the carburetor. Use the reserve fuel only when the main supply is exhausted. Refill the tank as soon as possible after switching to "RES" position. The reserve fuel supply is specified as per our model.
Note
- Do not operate the two-wheeler with the fuel valve in the "RES" position after refilling, you may run out of fuel, with no reserve.
- Do not keep the fuel valve between "ON" and "OFF" position while riding, since this may drain reserve fuel from the tank.
Brakes
Front Brake (Drum Type)
Check operation and adjust free play if necessary
Adjustment of Drum type Front Brake
- Measure the distance the front brake lever (1) moves before the brake starts to take hold, this free play (2) should be 10-20 mm measured at the tip of the brake lever.
- Make free play adjustments by turning the adjusting nut (3) at the front brake arm (4) Make sure the cut out on the adjusting nut is seated on the brake arm pin after making final free play adjustment.
- Apply the brake several times and check for free wheel rotation when released.
Note
If proper adjustment cannot be obtained by this method, see your nearest Workshop of Hero Authorized Distributor or the Authorized dealer(s) of the Distributor.
Rear Brake
Adjustment of Drum type Rear Brake
- Place the two - wheeler on main stand.
- Measure the distance (1) brake pedal moves before the brake starts to take hold, this free play (2) should be 20 - 30 mm.
- If adjustment is necessary, turn the rear brake adjusting nut (3). Make sure that the cut out on the adjusting nut is seated on the brake arm pin (4) after the final adjustment has been made.
- Apply the brake several times and check for free wheel rotation when released.
Note
If proper adjustment cannot be obtained by this method, see your nearest Workshop of Hero Authorized Distributor or the Authorized dealer(s) of the Distributor.
Brake Wear Indicators For Drum Type Brakes
When the brake is applied, an arrow (1) fixed to the brake arm (2) moves toward a reference mark (3) on the brake panel (4), if the arrow aligns with the reference mark on full application of the brake, the brake shoes must be replaced.
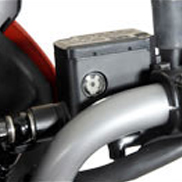
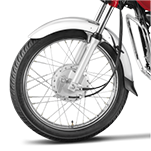
Front Brake (Disc Type)
Check for correct brake fluid level in the master cylinder. The master cylinder or the reservoir is located on the right handle bar
Recommended Brake Fluid:Dot 3 or Dot 4
Ensure that the brake fluid level does not fall below “MIN” mark on the master cylinder, when checked with the master cylinder parallel to the ground. If the brake oil level decreases abruptly, check for the leakages in the brake system and consult your Workshop of Hero Authorized Distributor or the Authorized dealer(s) of the Distributor.
Note
Clean the dirt and mud accumulated between the brake pads and caliper and the disc by using a water jet. Always contact your Workshop of Hero Authorized Distributor or the Authorized dealer(s) of the Distributor for refilling of master cylinder when necessary.
Caution
Do not mix Dot 3 and Dot 4 brake fluids.
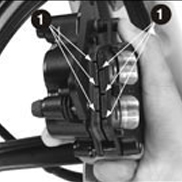
Brake Wear Indicators For Disc Type Brakes
Check and examine the wear indicator groove (1) on each pad. If the wear limit groove on either pads reaches the edge of the brake disc then replace the pads.
Brake pad wear depends upon the severity of usage, the type of riding and road conditions. Generally, the pads will wear faster on wet and dirty roads. Inspect the pads at each regular maintenance interval.
Warning
Always apply front and rear brakes simultaneously to avoid skidding of vehicle.
Tyres
Tyres
The tyres that are fitted on your motorcycle are designed to match the performance capabilities of your motorcycle and provide the best combination of handling, braking, durability and comfort. To safely operate your motorcycle, the tyres must be of recommended type and size, in good condition with the adequate tread, and correctly inflated.
Properly inflated tyres provide the best combination of handling, tread life, and riding comfort. Generally, under-inflated tyres wear unevenly, adversely affect handling, and more likely to fail from being overheated. Under inflated tyre can also cause wheel damage in rocky terrain. Over inflated tyres make your motorcycle ride more harshly, and more prone to damage from surface hazards, and wear unevenly.
Check tyre condition and air pressure. Whenever you check the tyre air pressure, you should also examine tyre treads & sidewalls for wear, damage & foreign objects. Look for –
- Bumps or bulges in the side of the tyre or the tread. Replace the tyre if you find any bumps or bulges.
- Cuts, splits or cracks in the tyre. Replace the tyre if you can see fabric or cord.
- Excessive tread wear: Also, if you hit a pothole or hard object, pull to the side of the road as soon as you safely can and carefully inspect the tyre damage.
- Replace tyres immediately when the wear indicator appears on the tyre. The tread limit or the minimum tread depth is 1.0 mm for both front and rear tyres.
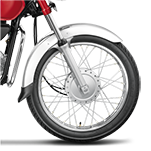
Unidirectional Tyres
Some tyres are unidirectional. That means they need to be fitted in a particular direction only. Whenever the tyre is removed and put back in case of puncture you must ensure that the arrow mark on the tyre is in the same direction as that of forward rotation of the wheel.
Make sure the valve stem caps are secure. If necessary, install a new cap.
Caution
Over inflation / under inflation will affect the performance.
Warning
- Operation with excessively worn tyres is hazardous and will adversely affect traction and handling and may even cause an accident.
- Follow all instructions given in the owner's manual regarding tyre inflation and maintenance.
- Under-inflation may results in the tyre slipping on, or tyre coming off the rim.
Tyres fitted with Tube with puncture endurance [Achiever/Xtreme/Hunk/Pleasure]
Compared with ordinary tyre tube, the Puncture Resistance Tube releases little air when punctured by a nail or other similar object. For this reason even though they remain fully inflated it is important to regularly check the tyre for embedded objects.
Note:
The Puncture Resistance Tube is not intended to prevent tyre puncture completely. It is not effective in case of ‘L' shaped cut on the tread surface and damages or cuts in the tyre other than the tread surface.
Tyre Repair & Replacement
If a tube is punctured or damaged, you should replace it as soon as possible. A tube that is repaired may not have the same reliability as a new one, and it may fail while you are riding.
If you need to make a temporary repair by patching a tube or using an aerosol sealant, ride cautiously at reduced speed and have the tube replaced before you ride again. Each time a tube is replaced, the tyre should be carefully inspected.
When replacing a Puncture Resistance Tube, be sure to select the size appropriate for the tyre. The Puncture Resistance Tube should always be repaired or replace by your Authorized Hero MotoCorp Workshop because of its special construction.
Clutch
Check for smooth operation and adjust the free play.
Clutch adjustment may be required if the two-wheeler stalls when shifting into gear or tends to creep or if clutch slips, causing acceleration to lag behind engine speed. Normal clutch lever free play is 10-20 mm at the lever.
- To adjust the free play, loosen the lock nut. Turn the adjusting nut to obtain the specified free play. Tighten the lock nut and check the free play.
- Start the engine, press the clutch lever and shift into gear. Make sure the engine does not stall, and the motorcycle does not creep. Gradually release the clutch lever and open the throttle. The motorcycle should start smoothly and accelerate.
Note:Check that the clutch cable routing is correct. If proper adjustment cannot be obtained or the clutch does not work correctly, visit your Workshop of Hero Authorized Distributor or the Authorized dealer(s) of the Distributor.
Other Checks:
- Check the clutch cable for kinks or signs of wear that could cause sticking or failure.
- Check for clutch cable model. Use genuine clutch cable.
- Check for clutch cable routing.
Steering
Check for smooth action and maneuverability.
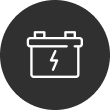
Battery
The battery is located behind the right side cover. Check the battery electrolyte. The electrolyte level must be maintained between the upper and lower level marks in the side of battery. If the electrolyte level is low, remove the nut and remove the bracket for access to the battery. Remove the battery filler caps. Carefully add distilled water to the upper level mark using a small plastic funnel.
Note
- Use only distilled water in the battery. Tap water may shorten the service life of the battery.
- Dispose off used/ old battery to authorized dealer only.
- Insufficient electrolyte results in sulphation & plate damage.
Caution
- When checking battery electrolyte level or adding distilled water, make sure the breather tube is connected to the battery breather outlet.
- Do not attempt to start or drive the motorcycle without a charged battery, it can cause fusing of the bulbs and permanent damage to certain electrical components.
Warning
The battery emits explosive gases. Keep sparks, flames & cigarettes away.
Fuse replacement: (HF Dawn, HF Deluxe, Splendor +)
The fuse holder is placed adjacent to the battery, which consists of spare fuse. The specified fuse is 7A.
Fuse replacement: (Super Splendor, Glamour and Achiever)
Kick-start model
The fuse holder is placed adjacent to the battery, which consists of spare fuse. The specified fuses are 15A & 10A.
Self-start model
The fuse holder is placed adjacent to the battery, which consists of spare fuse. The specified fuse is 15A with a spare fuse. The fuse holder is located over the solenoid switch adjacent to battery. The specified fuse is 20A with a spare fuse.
Fuse replacement: (Karizma)
The fuse holder is placed below the seat, which consists of spare fuse. The specified fuses are 15A, 7.5 A, 7.5A with a spare fuse each. The fuse holder is located over the solenoid switch adjacent to battery. The specified fuse is 20A with a spare fuse.
Warning
- Never use a fuse with different rating from that specified. It may lead to serious damage to electrical system or a fire due to short circuit.
Caution
The battery emits explosive gases. Keep sparks, flames & cigarettes away.
Lights & Horn
Check if the headlight, tail /stop light, turn signals, indicators and horn function properly.
Rear View Mirror
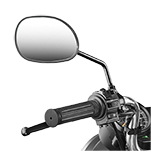
Ensure that the rear view mirror gives a good rear view when you are sitting on the motorcycle.
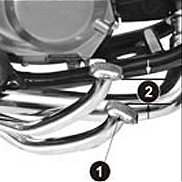
Air Suction Valve
Make sure all tube connections are secured properly.
- To meet emission standards, presently most of the models of Hero MotoCorp are provided with the air suction valve
- Air suction valve supplies fresh air from the air filter to the exhaust manifold to convert carbon monoxide to carbon dioxide.
- This reduces the CO% in the vehicles exhaust
Fittings & Fastners

Check & tighten if necessary.
Throttle
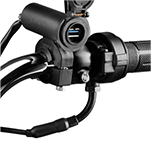
Check for smooth opening and closing in all steering positions.
Cable Inspection
Check for smooth rotation of the throttle grip from the fully open to the fully closed position. Check at full left and full right steering positions. Inspect the condition of the throttle cable from the throttle grip down to the carburetor. If the cable is kinked, chafed or improperly routed, it should be replaced or rerouted. Standard throttle grip free play (1) is approximately 2-6 mm of grip rotation.
Free Play Adjustment
Loosen the lock nut (2) and the adjuster (3).
FUEL SAVING TIPS
MAXIMUM MILEAGE. MAXIMUM RIDE.
Follow these guidelines and kick start an awesome journey on the road.
DO'S
- Drive at steady speed.
- Maintain correct tyre pressure.
- Adjust drive chain tension correctly.
- Get your engine tuned and motorcycle serviced regularly by a Hero MotoCorp authorised workshop.
DONT'S
- Do not keep the clutch lever pressed while driving.
- Do not run the engine in low gear for long times.
- Do not park your motorcycle under direct sunlight as it causes evaporation of petrol.
- Do not keep brake pedal pressed while riding.
- Do not raise the engine rpm during traffic halts, switch “OFF” the engine if the halt is more than 30 seconds.
- Do not cover inlet of air filter assembly.
- Do not cover the engine in the front and sides. This may restrict the smooth air flow to the engine fins required for air cooling and the engine may run at a higher temperature.
In case you wish to have the fuel efficiency tested, please visit the nearest |Authorised Hero MotoCorp workshop and ask for a fuel efficiency test (KPL Test) done. Make any adjustments that are found necessary.
STORAGE TIPS FOR YOUR VEHICLE WHEN LEAVING IDLE THESE DAYS

Weekly run engine idle for 60 sec to ensure proper fuel circulation.

While the vehicle is parked on main stand and engine running, shift the transmission in all gears for lubrication.
Weekly run engine idle for 5-6 minutes too keep the battery charged.

Minimum fuel to be maintained above:
- One segment blinking of fuel level indicator ( in case of digital fuel guage ).
- Red band ( in case of analog fuel guage ).
Park the vehicle on main stand on levelled surface to avoid damage due to fall.

Sunlight can damage seat and cause paint to fade. Clean, dry and store vehicle under a shade or keep it covered.

Maintain recommended tyre pressure and remember to rotate them once a week to avoid a flat spot.
Weekly run engine idle for 60 sec to ensure proper fuel circulation.
While the vehicle is parked on main stand and engine running, shift the transmission in all gears for lubrication.
Weekly run engine idle for 5-6 minutes too keep the battery charged.

Minimum fuel to be maintained above:
- One segment blinking of fuel level indicator ( in case of digital fuel guage ).
- Red band ( in case of analog fuel guage ).

Park the vehicle on main stand on levelled surface to avoid damage due to fall.

Sunlight can damage seat and cause paint to fade. Clean, dry and store vehicle under a shade or keep it covered.

Maintain recommended tyre pressure and remember to rotate them once a week to avoid a flat spot.
FUEL SAVING TIPS
MAXIMUM MILEAGE. MAXIMUM RIDE.
Follow these guidelines and kick start an awesome journey on the road.
DO'S
- Drive at steady speed.
- Maintain correct tyre pressure.
- Adjust drive chain tension correctly.
- Get your engine tuned and motorcycle serviced regularly by a Hero MotoCorp authorised workshop.
DONT'S
- Do not keep the clutch lever pressed while driving.
- Do not run the engine in low gear for long times.
- Do not park your motorcycle under direct sunlight as it causes evaporation of petrol.
- Do not keep brake pedal pressed while riding.
- Do not raise the engine rpm during traffic halts, switch “OFF” the engine if the halt is more than 30 seconds.
- Do not cover inlet of air filter assembly.
- Do not cover the engine in the front and sides. This may restrict the smooth air flow to the engine fins required for air cooling and the engine may run at a higher temperature.
In case you wish to have the fuel efficiency tested, please visit the nearest |Authorised Hero MotoCorp workshop and ask for a fuel efficiency test (KPL Test) done. Make any adjustments that are found necessary.
For Petrol Engine two/ three wheelers the current regulation requirement as follows:-
- Idle CO (Carbon Monoxide)% = 3.0 % (Max.)
- HC (Hydro carbon) ppm = 3000 ppm (Max.)
Vehicles which do not undergo a periodic maintenance are liable to emit exhaust gases more than the permissible limit.
Few Important tips to maintain low emission levels:-
- Clean spark plug and maintain specified gap between electrodes.
- keep the air filter clean.
- Get the carburetor tuned at authorized Hero MotoCorp Workshop.
- Do not overfill the engine oil and follow the replacement schedule.
- Avoid use of adulterated fuel.
- You should get the emission level certified once every 3 months at any of the authorized emission checking centres.
 Angola
 Argentina
 Bangladesh
 Bolivia
 Colombia
 Costa Rica
 Dominican Republic
 DRC
DRC
 Ecuador
 El Salvador
 Ethiopia
 France
 GCC
GCC
 Germany
 Great Britain
 Guatemala
 Guinea
 Guyana
 Haiti
Haiti
 Honduras
 India
India
 Italy
Italy
 Kenya
Kenya
 Madagascar
 Mexico
 Myanmar
 Nepal
Nepal
 Nicaragua
 Panama
 Peru
Peru
 Philippines
 South Africa
 Spain
Spain
 Sri Lanka
 Tanzania
 Trinidad
 Turkey
 Uganda
 Zambia